Carry Awards
 Insights
 Liking
 Projects
 Interviews
Carryology delivered. Your inbox. every two weeks.
Only the best stuff (and giveaways!), we promise.

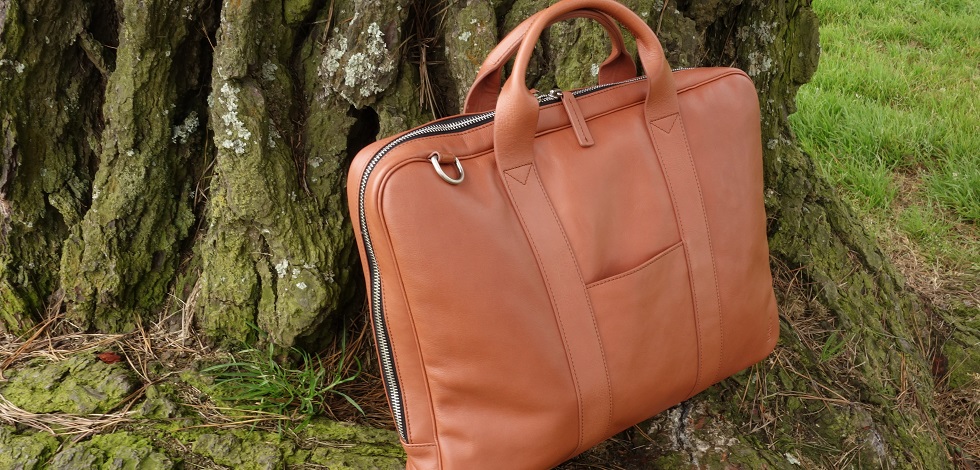
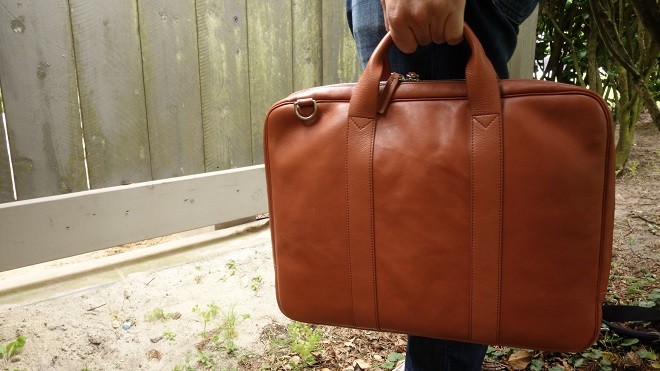
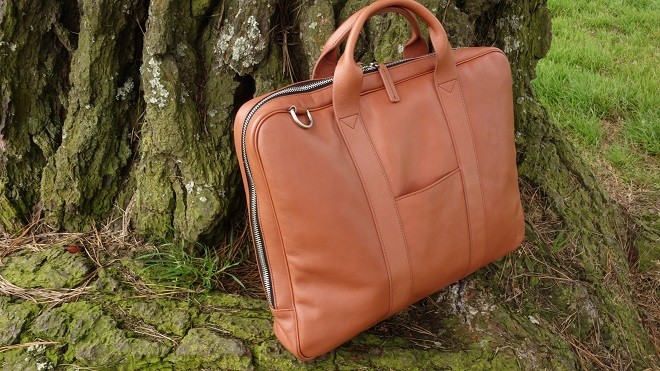
Drive By :: Toffee Lincoln Briefcase
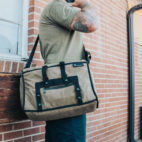
Briefcases are seeing a renaissance of late, becoming the carry of choice for the professional urban employee. They lend a sophisticated style and minimalist approach that has carried over from the #menswear world. I’m happy to report that Toffee’s take, the Lincoln Briefcase, was more than up to the task. In fact, it’s still part of my carry rotation.
Who It Suits
Someone who wants a sleek briefcase that is reminiscent of Hermione’s purse from Harry Potter (given how much it can carry), despite its slim nature.

Who It Doesn’t
The corporate professional who needs a more traditional briefcase look/feel (looking at you lawyers with the number locks and large overall size).
The Good
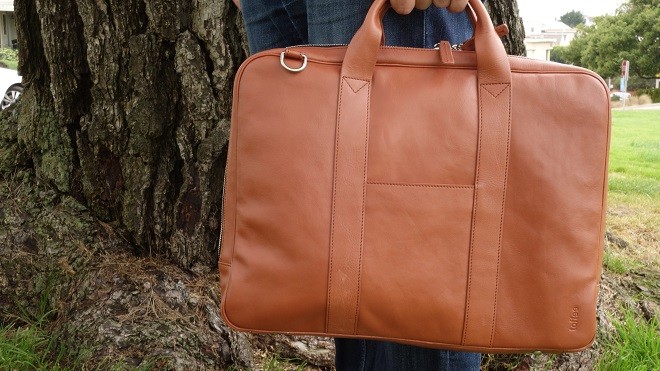
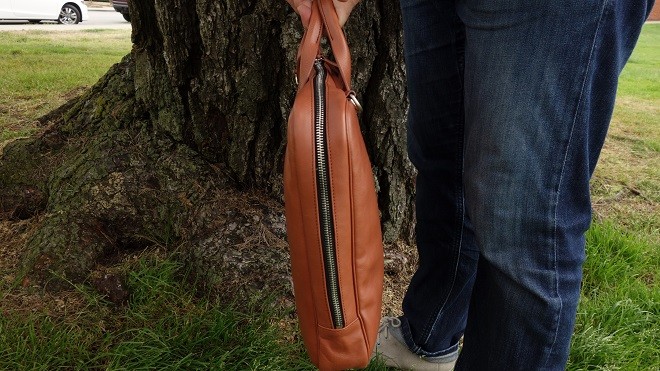
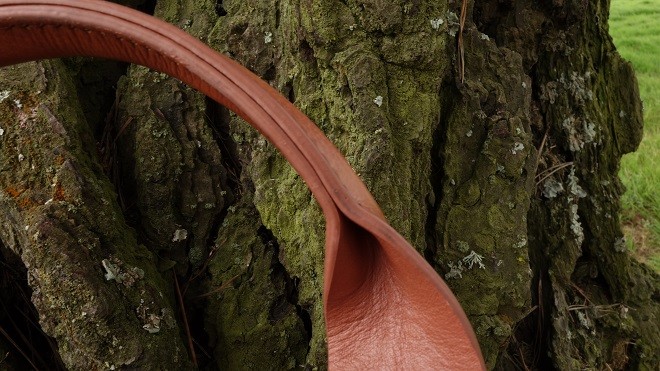
Something I learned as soon as I opened the box was that the photos don’t do this bag justice. The leather is soft and the overall style is the perfect side of casual. The first thing that blew me away was just how big it was. The profile is very slim and yet with the clamshell, the bag blossoms like a flower. Everything is within reach and easily accessible. That’s a huge win in my book.
“The leather is soft and the overall style is the perfect side of casual.”
Once open, you can’t help but be impressed by the volume. I was able to throw in my work laptop, requisite power cables, book and even a change of clothes from the gym without a problem. On some days when a book and lunch were all that were required, it was never a jigsaw or struggle to make it all fit. The bag was the closest thing I’ve experienced to Hermione’s purse from the Harry Potter series. No matter what you threw at it, everything seemed to fit!
“The profile is very slim and yet with the clamshell, the bag blossoms like a flower. Everything is within reach and easily accessible.”
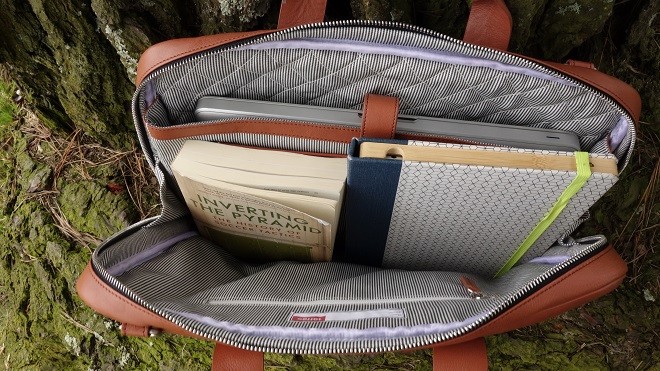
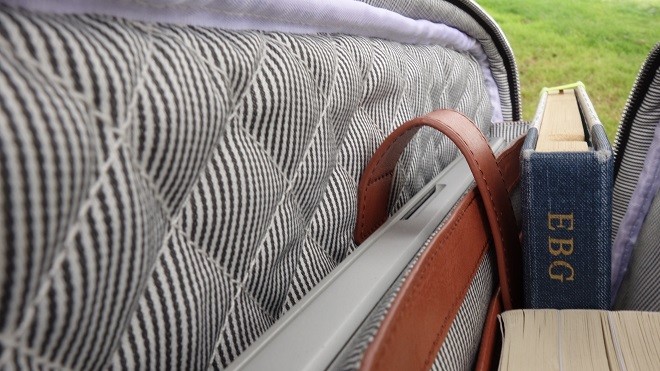
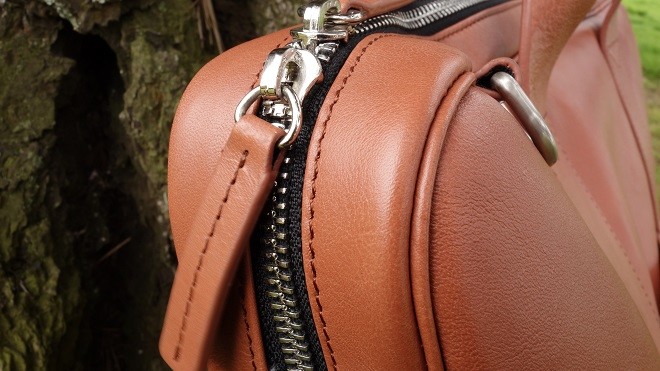
Now is where we dive into the details. The YKK zippers were incredibly smooth and never got caught, no matter how much was packed inside. Once opened, I quickly fell in love with the railroad conductor hat style pinstripe. The computer padding provided ample protection. The internal zipper wasn’t the most useful but it proved handy for business receipts so I wouldn’t lose them.
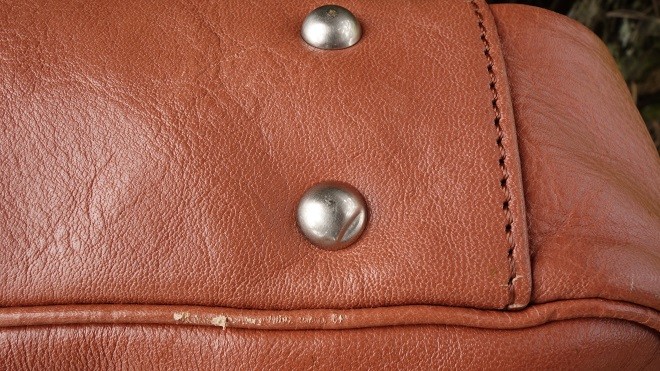
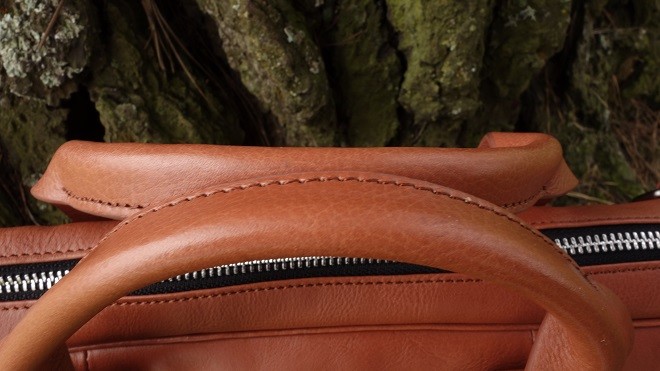
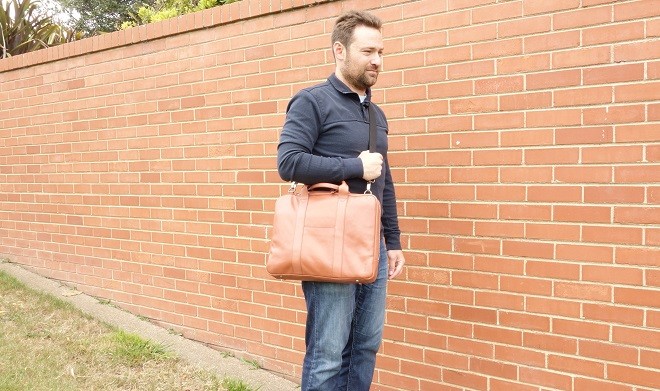
One of the key ingredients to any great briefcase is the handles, which Toffee nailed. For one, they are perfectly weighted in your hand. The best part about them though is that because of the angle in which they are sewn, they naturally tuck into each other so two handles become one when you carry. I didn’t really bother ever using the shoulder straps because the handles were never uncomfortable on my hands.
The Not So Good
This bag was so good that I struggled to figure out just where it went wrong. It’s so functional and casual that it is one of the best bags I’ve ever put to use, especially for those that are work appropriate. My only real gripe would be that it’s a big plain Jane (almost generic) on the style front where it’s not distinctive in any meaningful way. For example, from a style, shape and profile perspective, there isn’t a huge contrast between the Lincoln and Danny P’s leather messenger bag. Unlike the Linjer, Filson or even Killspencer which are so distinct you know it’s theirs just by glancing at it.
“My only real gripe would be that it’s a big plain Jane (almost generic) on the style front where it’s not distinctive in any meaningful way.”
Others To Consider
The perfect contender to go head to head with the Toffee Lincoln Briefcase is the Linjer Briefcase which costs a little more at $489 and is the more professional alternative for any environment. If you prefer the more casual route, there’s always Filson’s Original Briefcase which at $265 is great value comparatively if twill is your game. Or there’s Killspencer’s Attache Briefcase because well, it’s a Killspencer bag.
Conclusion
I continue to be impressed every time I use the Toffee Lincoln Briefcase. It’s spacious, features fantastic construction and materials, and the casual style is perfect for life in the big city. At $314.70, it’s great value against bags that would otherwise go for twice that or more.