Packing for the Appalachian Trail
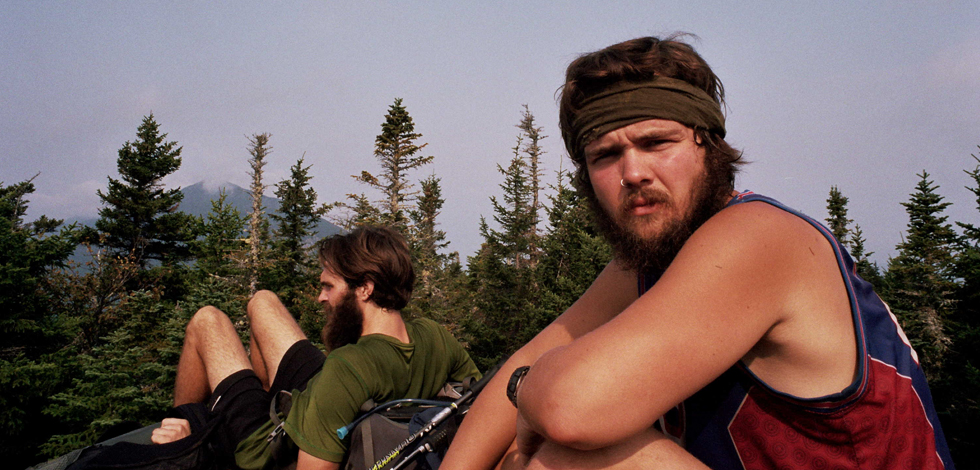
We’ll say it straight – thru-hiking the Appalachian Trail is gnarly. Beckoning the intrepid adventurer is 2189 miles (3523km) of beautiful, frustrating, exhausting and ultimately unforgettable trail. That equates to months of hiking…six months and ten days to be precise for Pie. In 2015 he successfully completed this demanding but rewarding thru-hike, contending with changing seasons along the way and nothing but the gear on his back to see him through several days until his next resupply opportunity. Discover his approach to packing for the Appalachian Trail below…
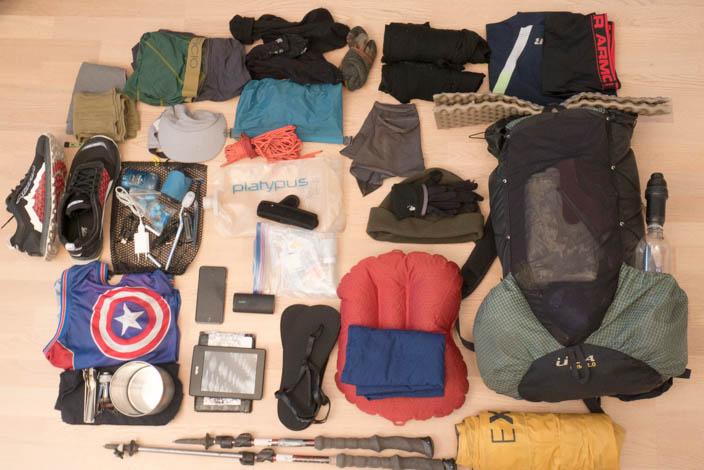
I grew up in a small town on the outskirts of London where something on the scale of the Appalachian Trail was unimaginable.
Straight out of school I settled into the steady routine of the rat race, heading into London to work a job I hated. Four years after starting down this path I had to take a break, I had to escape. I’d always thought of myself as an adventurous person but realised I’d not done anything big; I’d got stuck in a rut.
I got a second job and saved hard for six months. I applied to work at a summer camp in New York State and in May of 2010 off I went.
It was on a two-night hike on the Appalachian Trail (AT) with my group of unenthusiastic kids that I realised that one day I would return and attempt to walk the entire length of the trail.
From 2010 onwards I’ve lived a life of work and travel, travel and work. Coming home between trips to gather together enough funds to head off again. In this time I met the girl of my dreams and moved to her native hometown of Helsinki, Finland.
In the summer of 2015 she had plans to do a semester studying abroad and I realised this would be perfect timing for me to conquer the Appalachian Trail.
Being the gear geek that I am I started reading and researching everything I could find about ultralight hiking and the gear needed for the Appalachian Trail.
I knew that gear selection for a thru-hike of the AT would dramatically affect the overall experience and the final outcome of the trip.
Some of the main factors I had to consider when selecting my gear included:
Weight Vs. Durability – The benefits of having a lightweight pack on a 2189-mile, six-month hike are almost endless. For me, having a lightweight pack was my biggest priority when choosing my gear. Durability was also important, as I didn’t want to have to replace gear on the trail.
However, lighter gear tends to be less durable so I tried to find a happy medium between the two. My base weight was around 18lbs, not the lightest on the trail but definitely at the lower end of the scale.
“For me, having a lightweight pack was my biggest priority when choosing my gear. Durability was also important, as I didn’t want to have to replace gear on the trail. However, lighter gear tends to be less durable so I tried to find a happy medium between the two.”
Climate – You need to be prepared for every kind of weather when thru-hiking the Appalachian Trail. I started March 5th and so was prepared for some snow and temperatures down to about 15 degrees Fahrenheit. In the summer we were dealing with temperatures in the high nineties with a lot of humidity. Oh and don’t forget the rain, we got our fair share of that too.
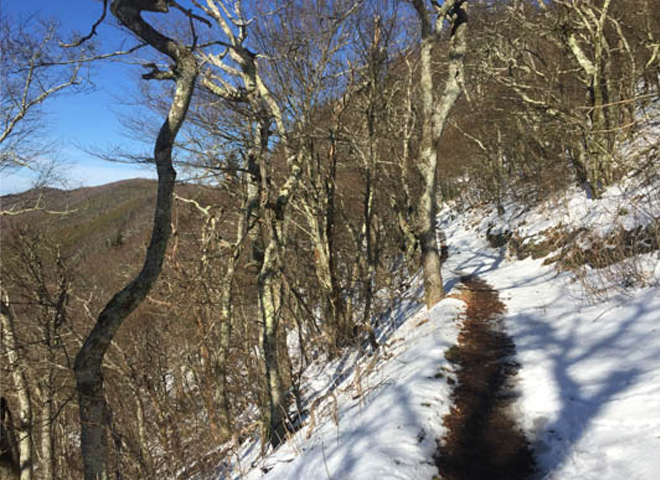
Self-Sufficiency – The AT crosses a major road every three to four days and most people head into town to resupply on food, take a shower etc. With that being said you need to be self-sufficient on the trail. You need to carry your own shelter, have enough food for a few days and have a way to stay warm and dry.
“You need to be prepared for every kind of weather when thru-hiking the Appalachian Trail.“
Cost – I had to purchase some new gear before the trip. I also had to get my flights to the US and fund the trip itself so I couldn’t afford to blow my entire budget on gear.
With all these factors in mind, let’s dive into the gear that I took on the trail.
“…you need to be self-sufficient on the trail. You need to carry your own shelter, have enough food for a few days and have a way to stay warm and dry.“
Packing
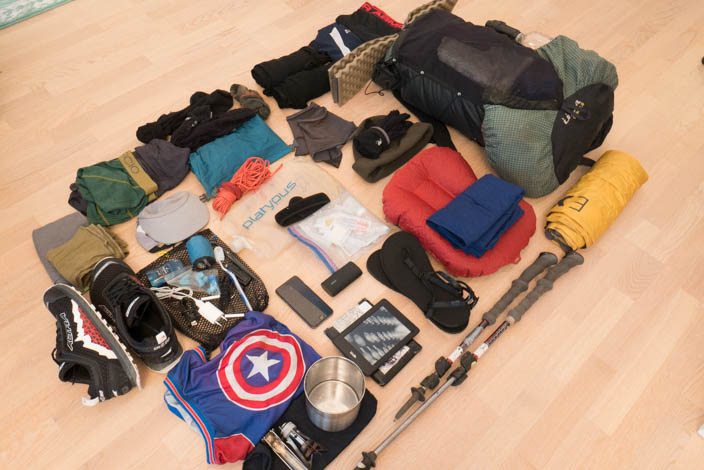
For my pack I used the excellent Ohm 2.0 from Ultralight Adventure Equipment. Weighing in at around one pound it has a minimal frame and is made with a mixture of Dyneema Ripstop and Silnylon. The design of the pack makes it extremely functional but also hard-wearing and lightweight. Although it shows signs of wear the pack is still going strong and I’ll continue to use it on all my backpacking adventures.
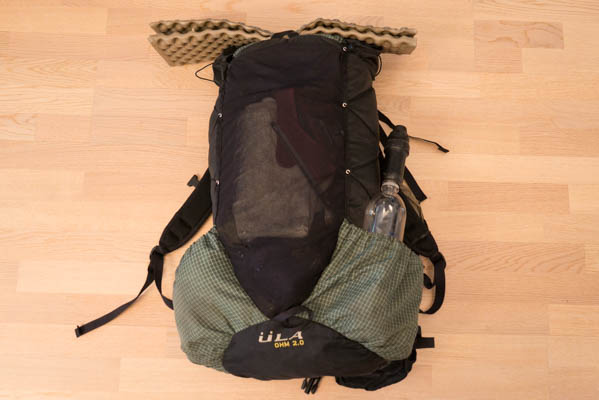
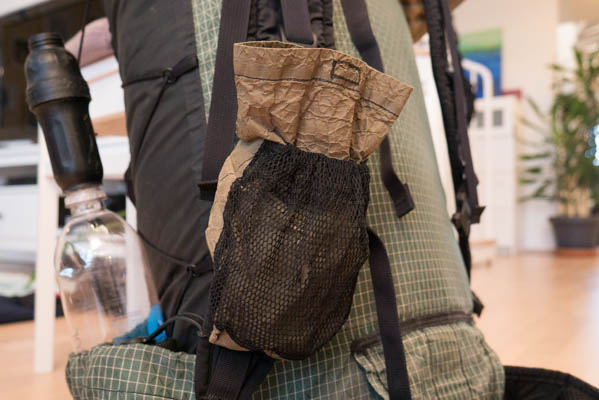
Attached to the shoulder straps were two Backpack Shoulder Pouches from ZPacks. These proved extremely useful, allowing me to access items such as my phone and snacks without having to take my pack off. I used a number of accessories from ZPacks, a backpacking company known for their ultralight Cuben Fiber gear.
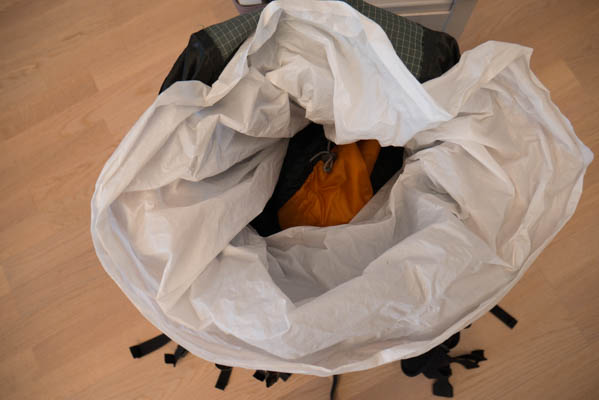
To waterproof the pack I used a trash compactor bag to line the inside of the pack. I stuffed all my camp clothes and sleeping gear into it and rolled it down. I never had an issue with my gear getting wet.
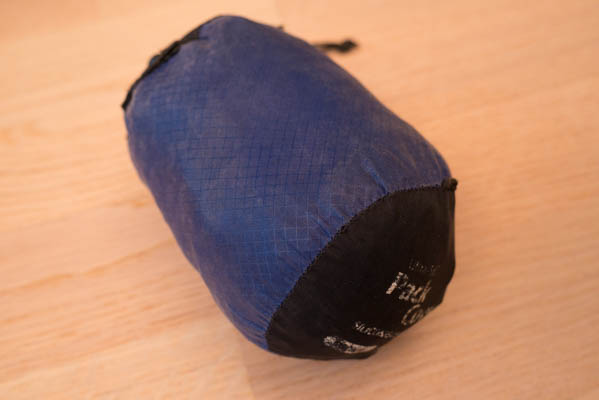
I also used a silnylon pack cover from Sea to Summit to keep all the gear in the outside mesh pocket dry and prevent the pack itself from becoming saturated.
“Attached to the shoulder straps were two Backpack Shoulder Pouches from ZPacks. These proved extremely useful, allowing me to access items such as my phone and snacks without having to take my pack off.“
The Roll Top Blast Food Bag from ZPacks held my food. Its rectangular shape is designed to fit vertically inside smaller, ultralight packs. Its shape means it also has a larger opening than most stuff sacks, making is easier to organise your food and find what you’re looking for.
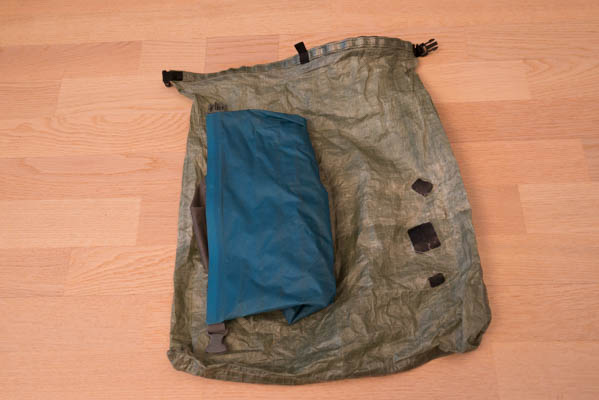
A silnylon stuff sack from Sea to Summit held my cooking gear and all the small stuff, keeping it organised and further protecting it from the elements.
“To waterproof the pack I used a trash compactor bag to line the inside of the pack.“
Worn Clothing
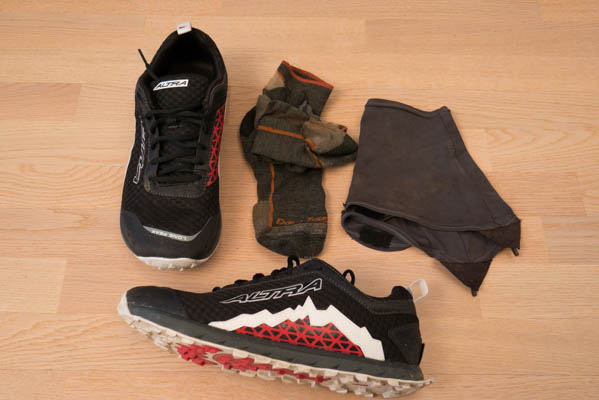
I used Altra Trail running shoes and Darn Tough socks on the trail. This combo let me hike long days with minimal foot pain and zero blisters the entire trail. I’m a big proponent of zero drop footwear and I’ve yet to find a shoe company that offers a better shoe than Altra.
Dirty Girl Gaiters stopped trail debris getting in my shoe. They’re a stretchy breathable gaiter that can attach to any running shoe.
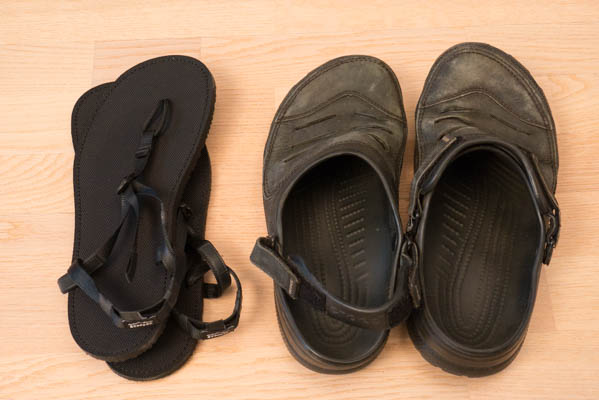
For camp shoes I used a pair of Bedrock Sandals – they’re my favourite barefoot running sandal and made for great camp shoes. Unfortunately I lost one of the Bedrocks in a lake in Maine and had to switch to a pair of Crocs; they did their job well and are the camp shoe of choice for most thru-hikers.
“The Roll Top Blast Food Bag from ZPacks held my food. Its rectangular shape is designed to fit vertically inside smaller, ultralight packs.“
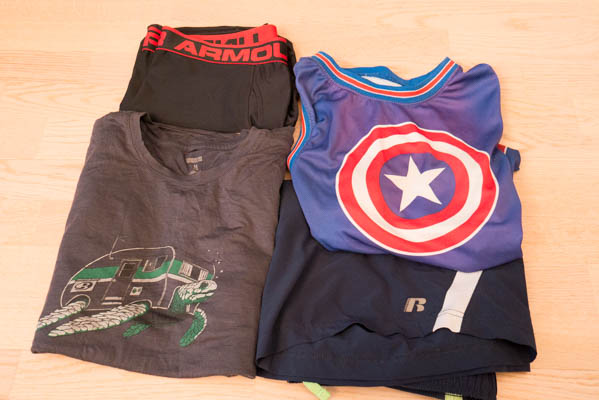
I think it’s worth spending the extra money on good underwear. Under Armour and ExOfficio boxers breathe well, are tight-fitting to prevent chafing and dry quickly.
Cheap running shorts are all you really need for the AT. Many people preferred “short shorts” but I seemed to do well with any length.
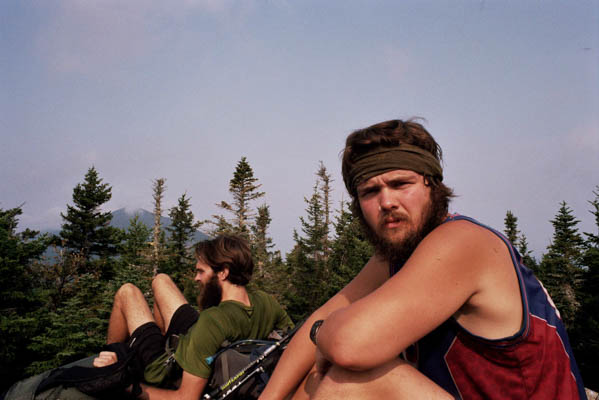
I used an Icebreaker merino wool t-shirt for the first half of the trail. It wicked sweat well and didn’t stink after a few days like synthetic shirts would. I eventually switched to this sweet synthetic Captain America jersey when the Icebreaker gave out and it made it all the way to Katahdin.
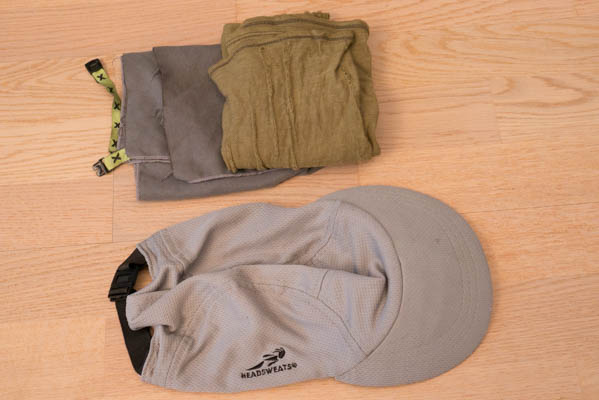
A baseball cap from Headsweats in conjunction with a wool Buff and a pack towel helped manage perspiration. It was nice to have a peaked cap to keep the sun out of my eyes; I didn’t feel the need to have sunglasses out on the trail though.
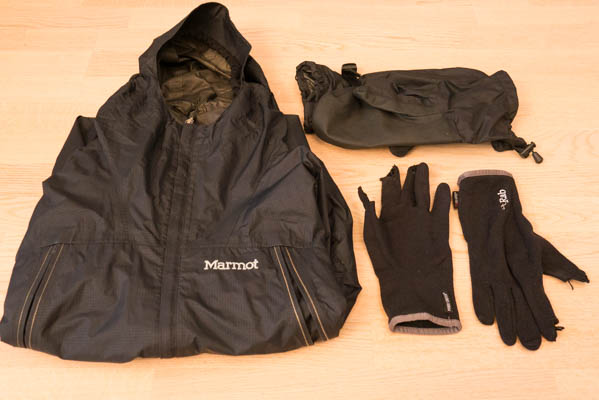
If the rain got bad or the temperatures dropped I threw on my Marmot Gore-Tex rain jacket. I’m not a big fan of Gore-Tex but it did its job well enough.
Thin fleece gloves from RAB kept my hands warm and Gore-Tex rain mitts from Extremities kept the fleece gloves from getting soaked.
Packed Clothing
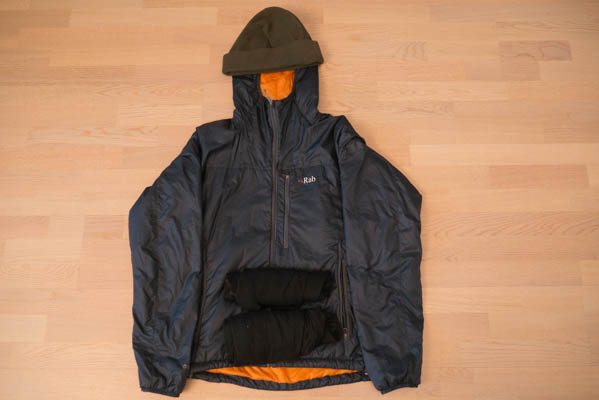
My main insulating layer was the Rab Xenon X Hoodie. This synthetic puffy never failed to keep me warm and was one of my favorite pieces of gear.
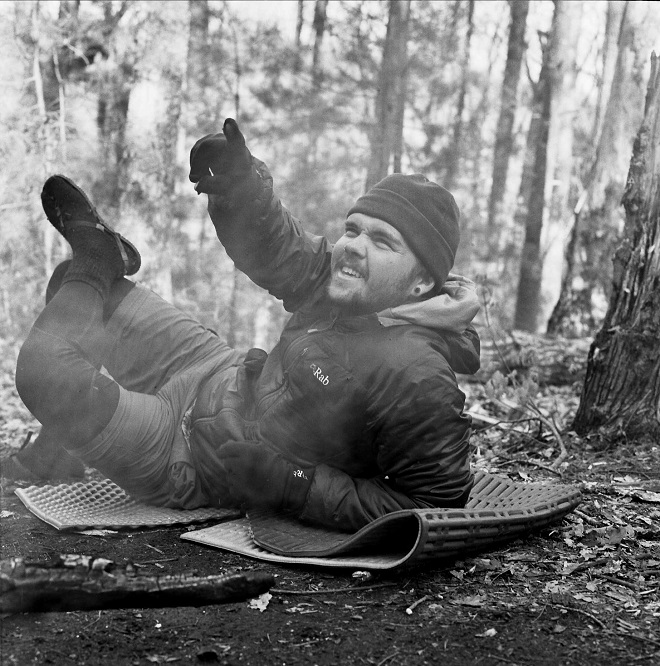
I carried a SmartWool long underwear top and bottom during the colder months for sleeping in with a pair of sleeping socks and a fleece beanie.
Compression socks helped calf/foot fatigue and were a “luxury” item worth carrying.
“My main insulating layer was the Rab Xenon X Hoodie. This synthetic puffy never failed to keep me warm and was one of my favorite pieces of gear.”
Sleeping
My Exped SynMat UL 7 and Air Pillow meant sleeping on uneven surfaces was a non-issue. I prefer rectangular sleeping pads that let me stretch out. Once you’ve used a proper inflatable pillow you’ll never switch back to a rolled-up jacket.
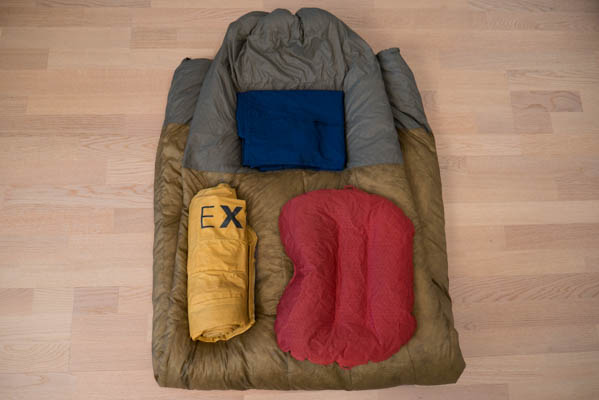
My biggest gear purchase was my Enlightened Equipment Revelation X Quilt. It’s rated down to twenty degrees and paired with all my clothes kept me warm on the coldest of nights. It has no hood and a “backless” design to save on weight. The Revelation packs down extremely small and weighs 1.3 lbs. It wasn’t cheap but I feel it was a wise investment.
“Compression socks helped calf/foot fatigue and were a “luxury” item worth carrying.“
Shelter
I think it’s vital to bring your own tent or tarp on a thru-hike of the AT. I chose to go really minimal and used a Wild Oasis Tarp by Six Moon Designs. The single walled, floorless design won’t be for everyone but it was really lightweight and disappeared into the side pocket of my backpack. I carried a piece of Tyvek as a groundsheet and seven stakes; the tent uses a single trekking pole in the center.
If I were to do it over again I’d probably look at a similar style tent but something that had a bathtub floor.
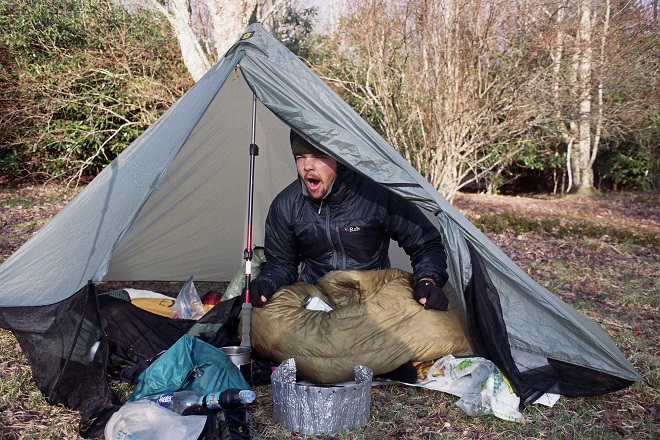
“I chose to go really minimal and used a Wild Oasis Tarp by Six Moon Designs. The single walled, floorless design won’t be for everyone but it was really lightweight and disappeared into the side pocket of my backpack.”
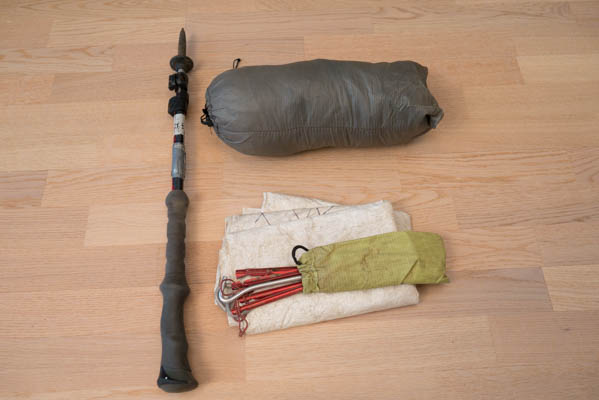
Cook Kit & Water
I used my old faithful PocketRocket stove from MSR. I’ve had it for years and it’s never let me down. I found a thin stainless steel pot for five euros and couldn’t justify spending the money on a titanium pot to save just a few grams. A long-handled titanium spoon, pot grabber and a pot cozy for freezer bag cooking rounded out the cook kit.
“I used my old faithful PocketRocket stove from MSR. I’ve had it for years and it’s never let me down.”
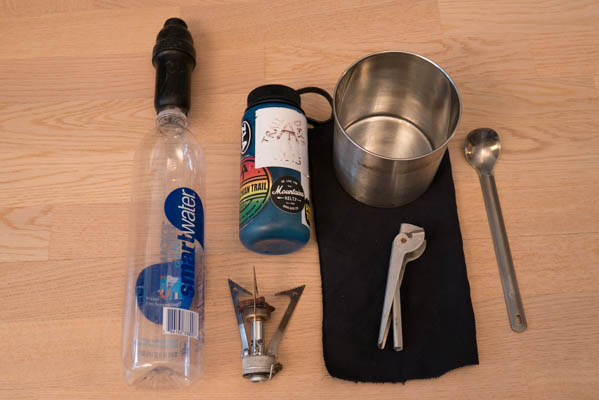
Water is prevalent on the Appalachian Trail so it’s not usually necessary to carry more than a litre at most.
I used one large Smart water bottle with my Sawyer filter permanently attached. The flow rate of the Sawyer can be pretty bad but it’s much better than the Sawyer Mini. I’m looking forward to seeing what innovations arise with water filtration as I think it’s definitely something that can be improved upon.
“Water is prevalent on the Appalachian Trail so it’s not usually necessary to carry more than a litre at most.“
I also carried a 500ml Nalgene to make coffee in and a Platypus water bag was great for collecting water in camp.
Electronics
My iPhone 6 was an absolute workhorse out on the trail. I used it as my only camera; I used the Kindle app to check the guidebook and listened to podcasts to get through the dull hiking sections. A LifeProof case saved it from the rain and I went through a couple of pairs of cheap headphones.
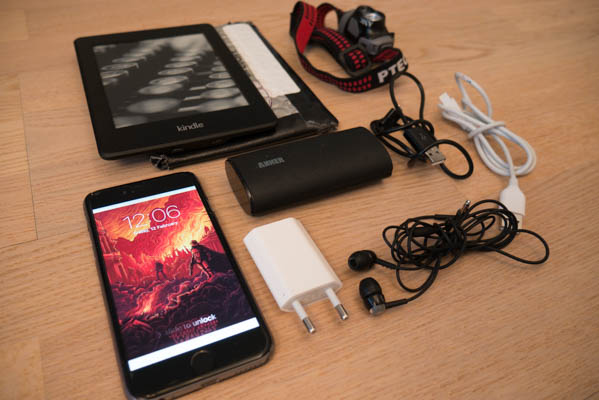
A small Anker external battery charged my phone two and a half times which was more than enough to get me from town to town.
My Kindle Paperwhite was definitely a luxury item but so worth it. It has a backlight with adjustable brightness so I didn’t need to use my headlamp to read and the battery life is phenomenal.
I recommend having a headlamp with a red light so as not to disturb people should you need to move around in the night. Using lights that take AA or AAA batteries makes it easy to find batteries wherever you go.
“I recommend having a headlamp with a red light so as not to disturb people should you need to move around in the night.“
The Small Stuff
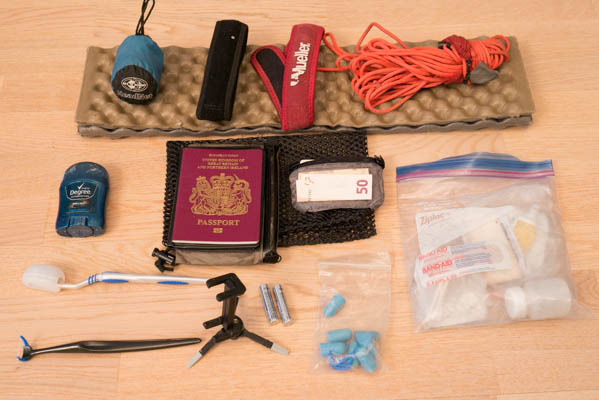
A section of closed cell foam to sit on insulates you from the ground and gives you a dry and clean place to sit down.
A small stuff sack as a rock bag and some paracord made for a lightweight bear hang kit.
Mosquito Head Net – I used it just once or twice but nice to have.
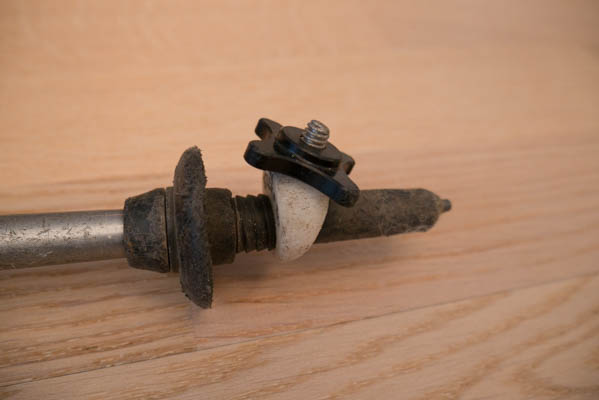
A StickPic helped me to get some different shots when filming video for YouTube.
Knife – Spyderco Dragonfly 2 – Small and lightweight, all you really need on the AT.
Minimal Toiletries – Toothbrush and paste, travel deodorant, earplugs and poop kit.
Small First Aid Kit – Band-Aids and blister care, ibuprofen, emergency water purification tablets and an Ace bandage.
Vaseline – I applied a coating of Vaseline to my feet every morning to prevent blisters and applied it to “sensitive” areas to help prevent chafing.
Black Diamond Trekking Poles – I recommend poles that use a flick lock system, as they seem to be less prone to failure. Stay away from Carbon Fiber poles, they shatter easily.
I used a Wallet Zip Pouch and the Passport Zip Pouch from ZPacks to keep my Passport protected inside my pack. I loved the wallet so much it’s now part of my EDC.
A mini tripod and phone clamp helped with some iPhone time lapses.
Spare batteries for the headlamp
Two knee braces – These combined with plenty of ibuprofen kept knee pain to a minimum.
“Using lights that take AA or AAA batteries makes it easy to find batteries wherever you go.”
A few words of wisdom for the Appalachian Trail
Avoid Gore-Tex – Despite the claims, Gore-Tex just doesn’t breathe well. Even in the coldest temperatures you will sweat when hiking and that moisture will stay trapped, making your clothes wet. Save Gore-Tex for less active pursuits.
If you’re on a tight budget avoid towns. The AT can be done on an extremely low budget if you stay away from the allure of burgers and beers whenever you head into town. That being said, I saved hard for my trip and thoroughly enjoyed the burgers and beers.
Practice some “trail dishes” before you leave home. You’ll get sick of trail food whatever happens but it’s good to figure out a few dishes that you like to eat before heading out on the trail. There are many good backpacking recipes online for you to try.
Do not mail yourself food boxes out on the trail. Resupplying on food in town is way less hassle and you can find whatever you need in almost every town.
“Practice some “trail dishes” before you leave home.“
Think about what luxuries YOU need. A few people brought a guitar and it was great for group morale, others brought camera gear to capture their trip, others Magic the Gathering cards. Figure out what’s going to make your hike more bearable and bring it, just don’t bring it all.
I discovered freezer bag cooking when researching the AT and adopted it straightaway. It’s easier to cook your meals and saves having to clean up after yourself. You can also buy items in bulk and separate it out for each meal.
There are many different styles of hiking the AT. I’d advise the average Joe to take it easy, take it slow. Of course if you’re trying to set a speed record then go for it. Otherwise, why would you rush? When it’s all over with, you’ll wish it wasn’t.
The Appalachian Trail was a wonderful experience. I learnt a lot about myself and what I’m capable of and encourage anyone to go and do the same.
Thanks for checking out my post. For some more in-depth reviews come visit me at www.pieonthetrail.com


 Carry Awards
 Insights
 Liking
 Projects
 Interviews
