Carry Awards
 Insights
 Liking
 Projects
 Interviews
Carryology delivered. Your inbox. every two weeks.
Only the best stuff (and giveaways!), we promise.

Carry Collaborations
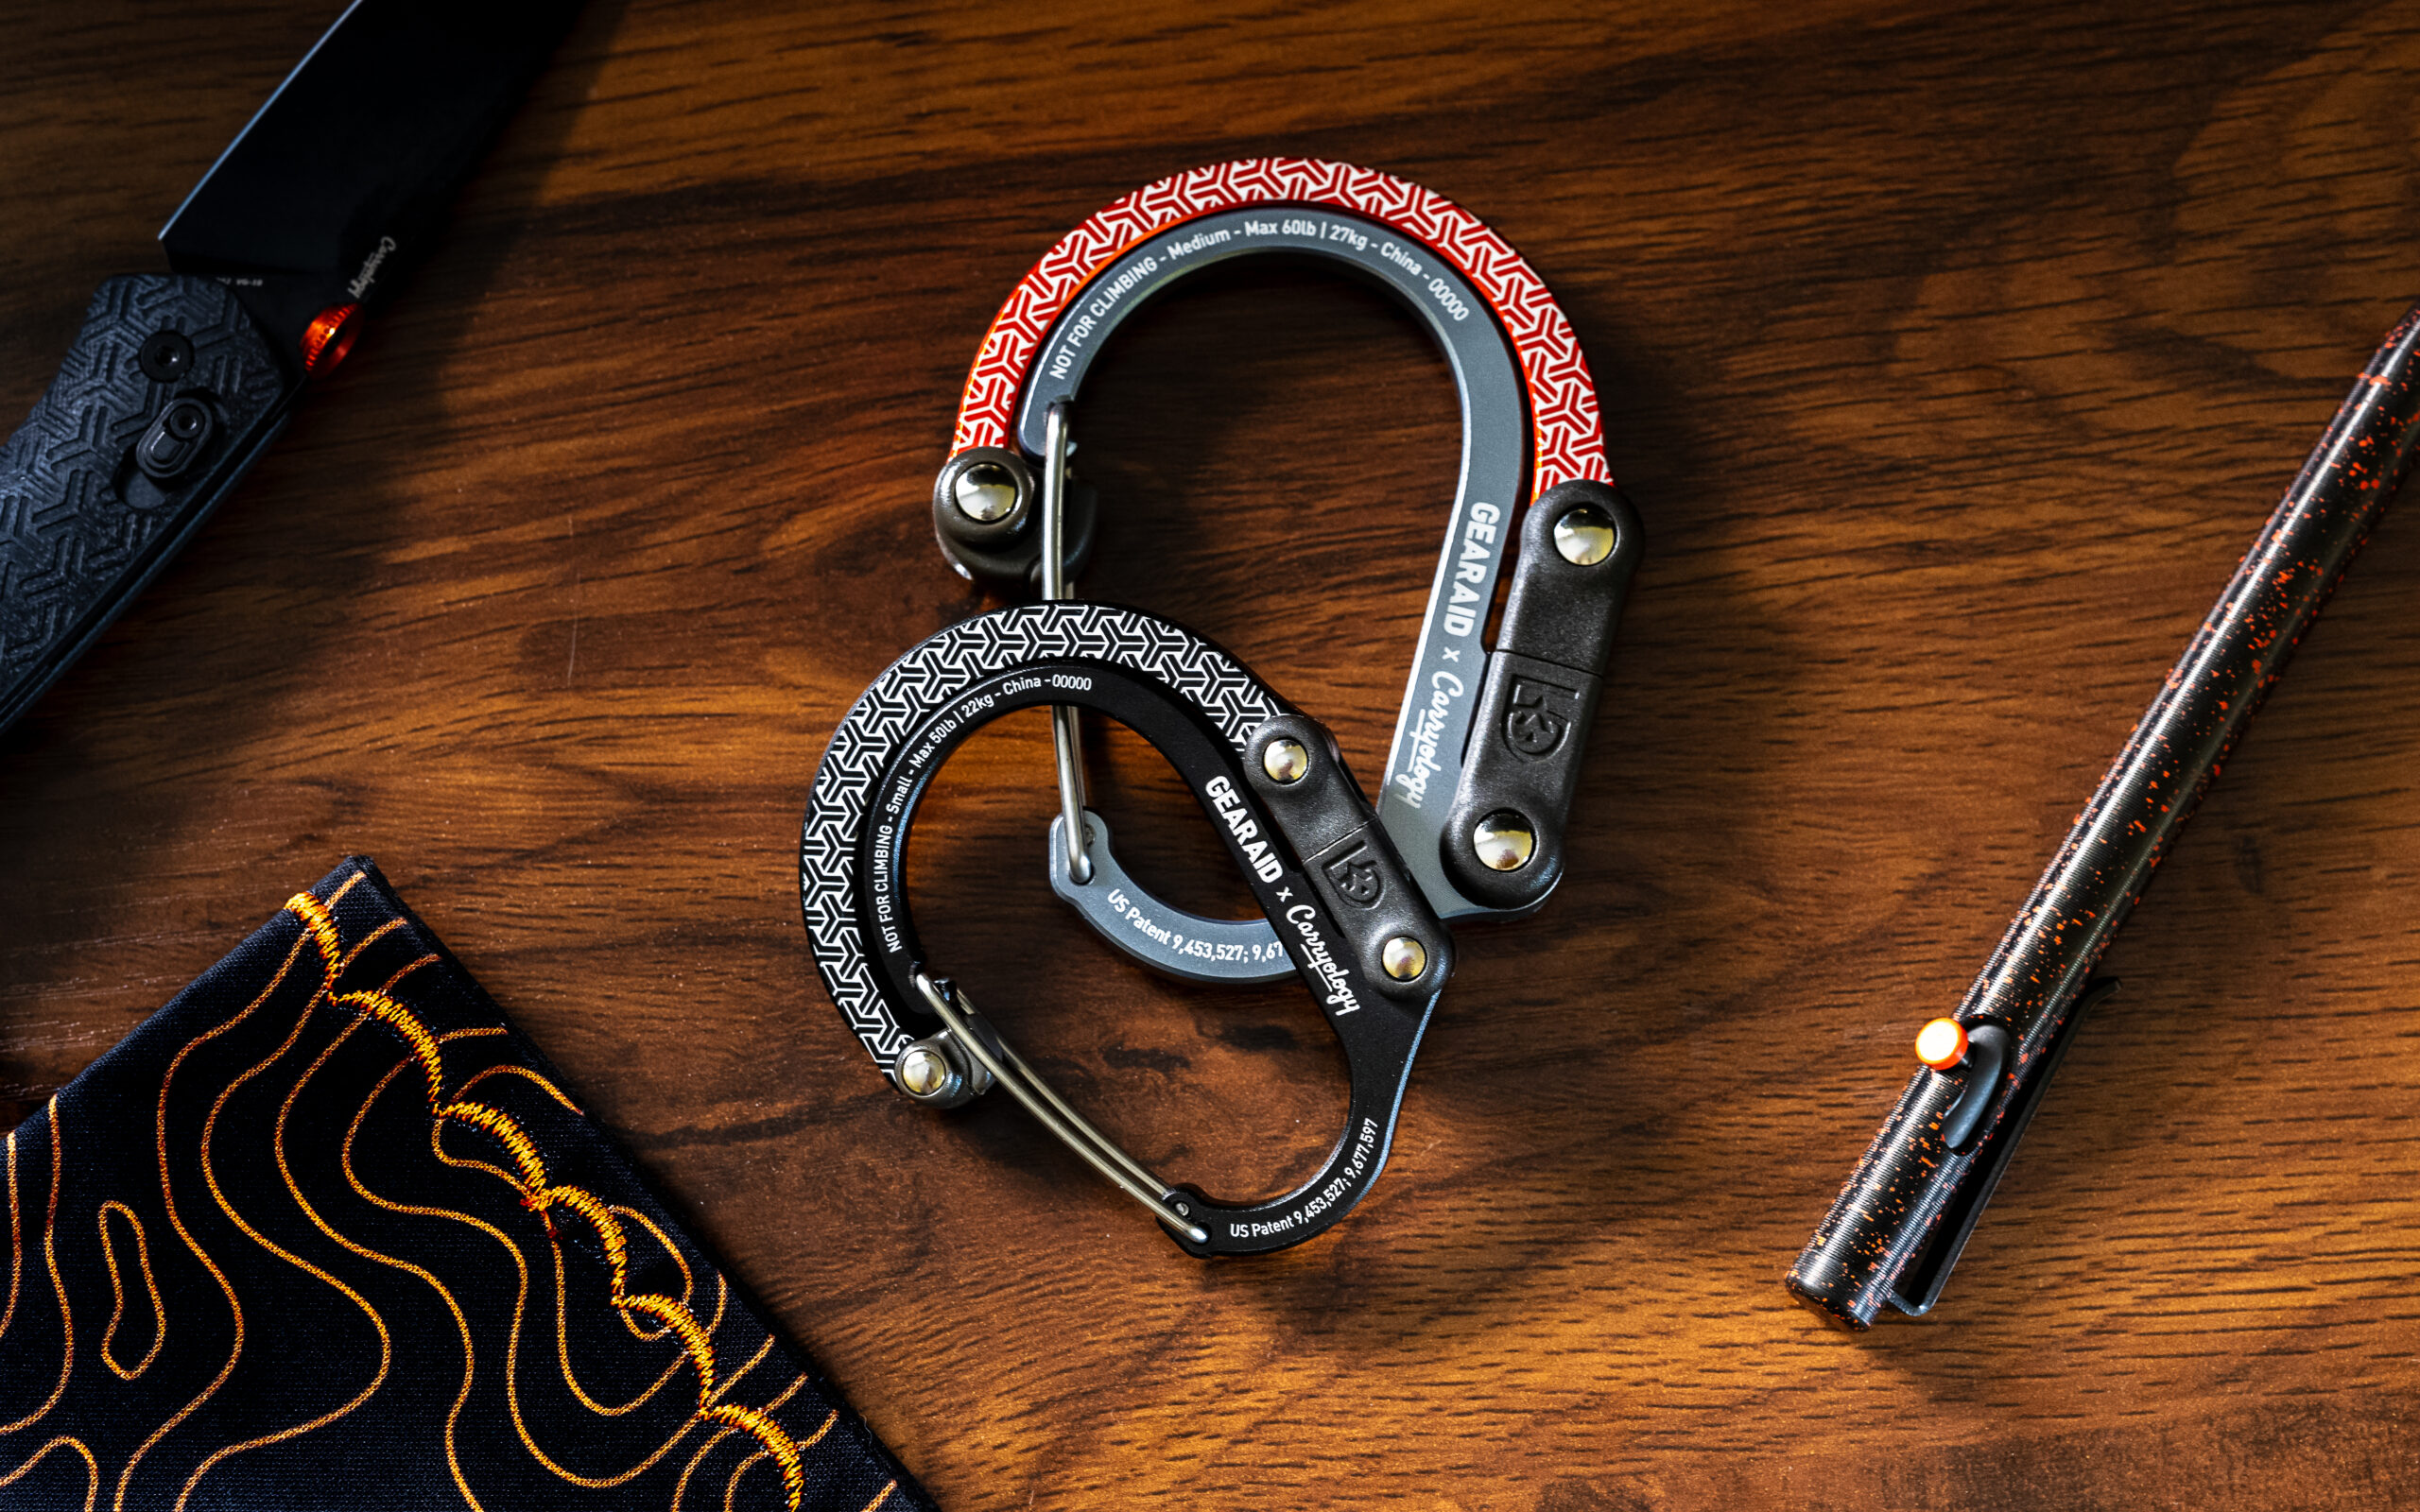
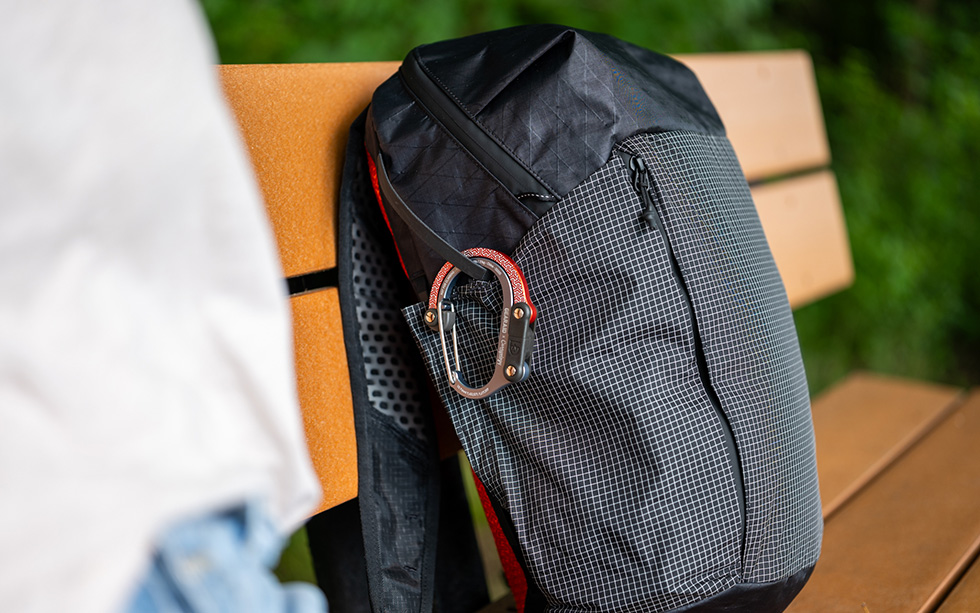
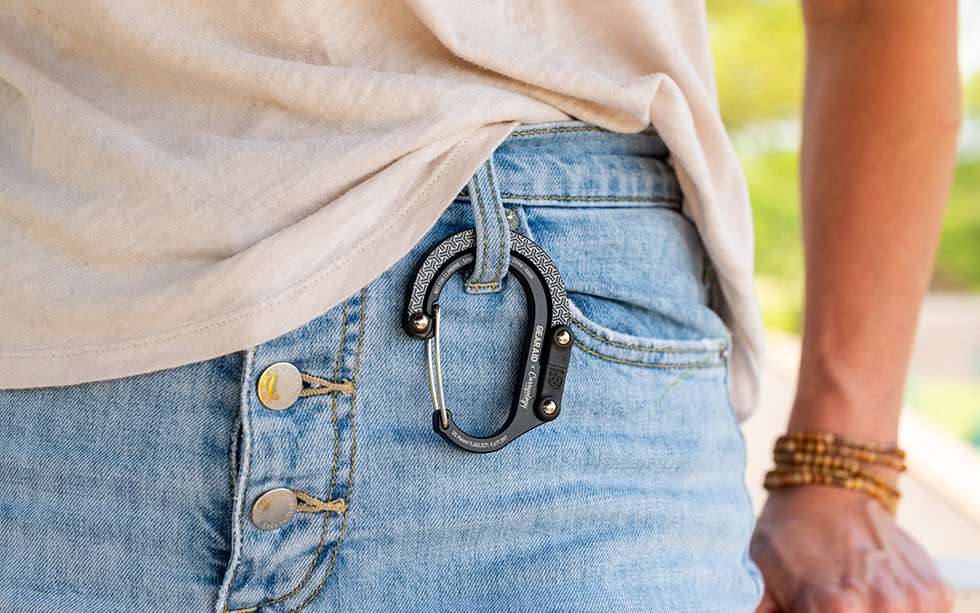
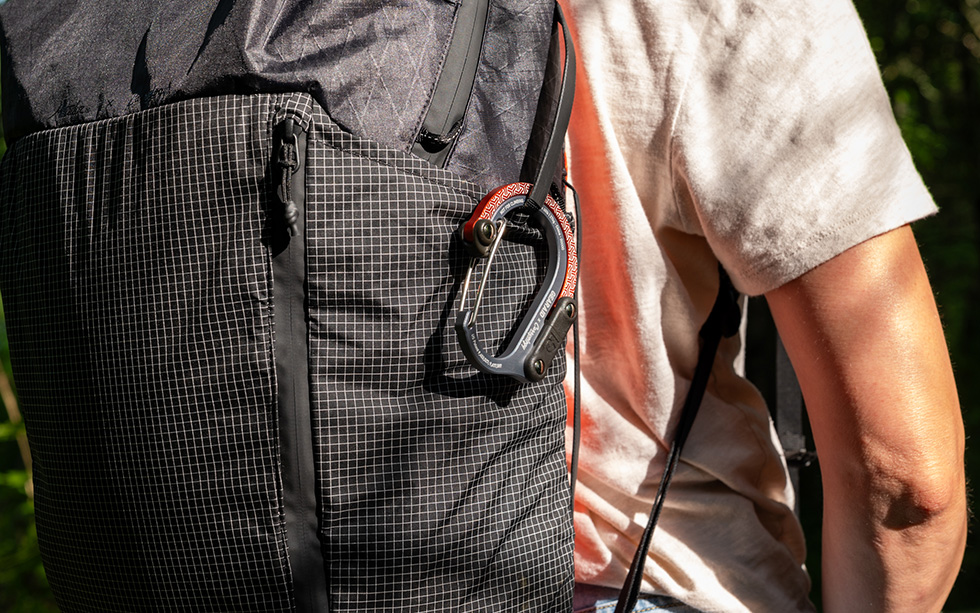
We are proud and excited to introduce the newly updated Carryology Essentials GEAR AID x Carryology Heroclip®.
After the unprecedented success of our first Essentials collaboration, and our limited edition Titanium Asanoha, we knew we had to bring everyone’s favourite accessory back.
Shipping USA Only
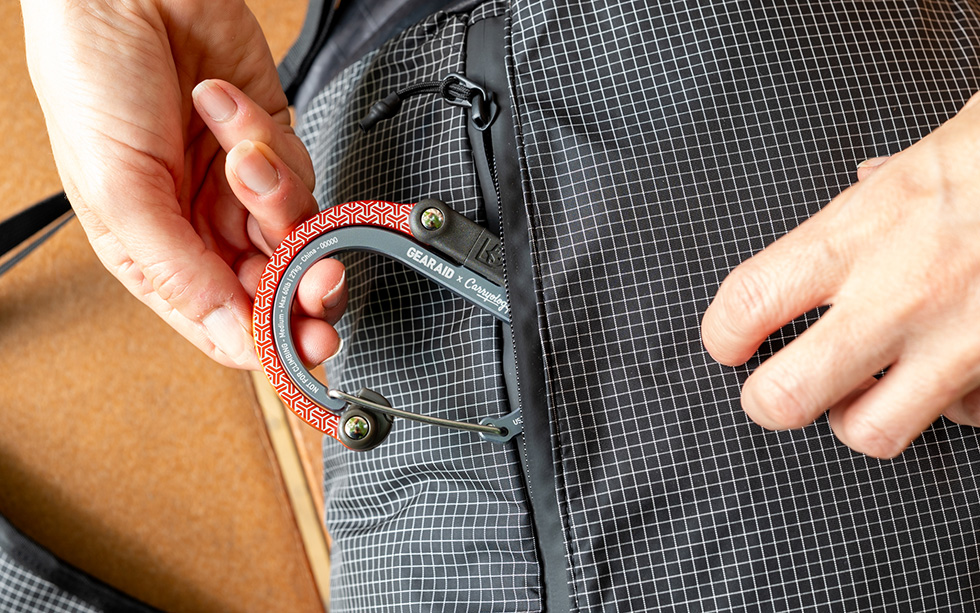
You don’t have to have spent long in the community to understand the love affair Carryologists have with the Heroclip®. Whether saving bags and jackets from airport bathroom floors or attaching extra key-sized EDC gear, the Heroclip® is an undeniable leader in the carabiner space. Hooking, twisting, turning, and hanging gear anywhere we go, the gear hanging possibilities are almost limitless.
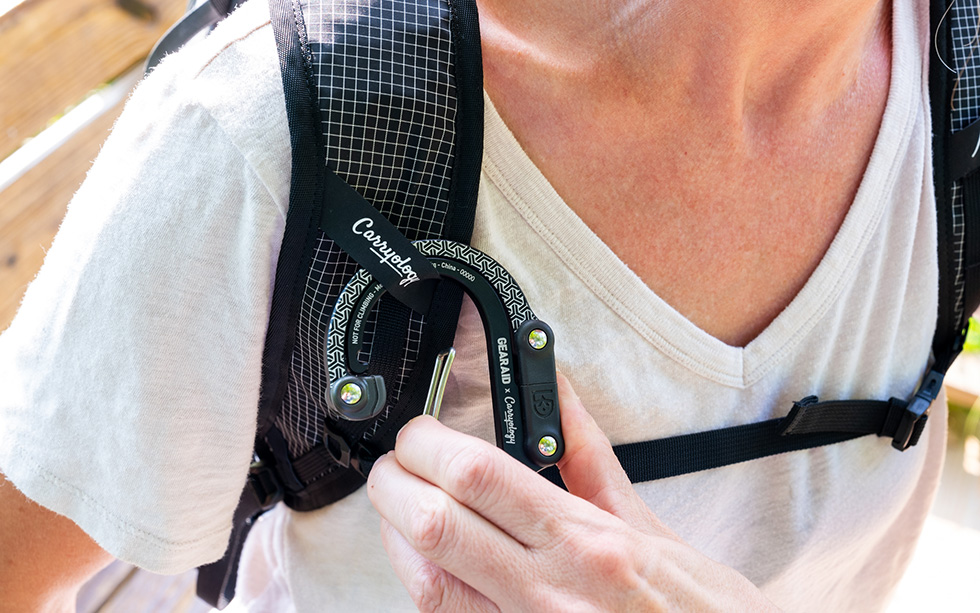
And this time we wanted to change it up. We’re amped to announce that the GEAR AID x Carryology Heroclip® now comes in two sizes: small and medium to suit almost every carry need, as well as coming in two colours. Yep, you guessed it. Orange and Black.
And a heads up: this is an Essential and will be restocked.
Featuring anodised black and orange finishing, along with our loved Auxikko geometric pattern, the GEAR AID x Carryology Heroclip® is ready for any adventure, both big and small!
SHIPPING
USA Shipping
Free shipping over $35
Ships within 7-10 days.
Purchase limit 8, 2 of each size and colour.

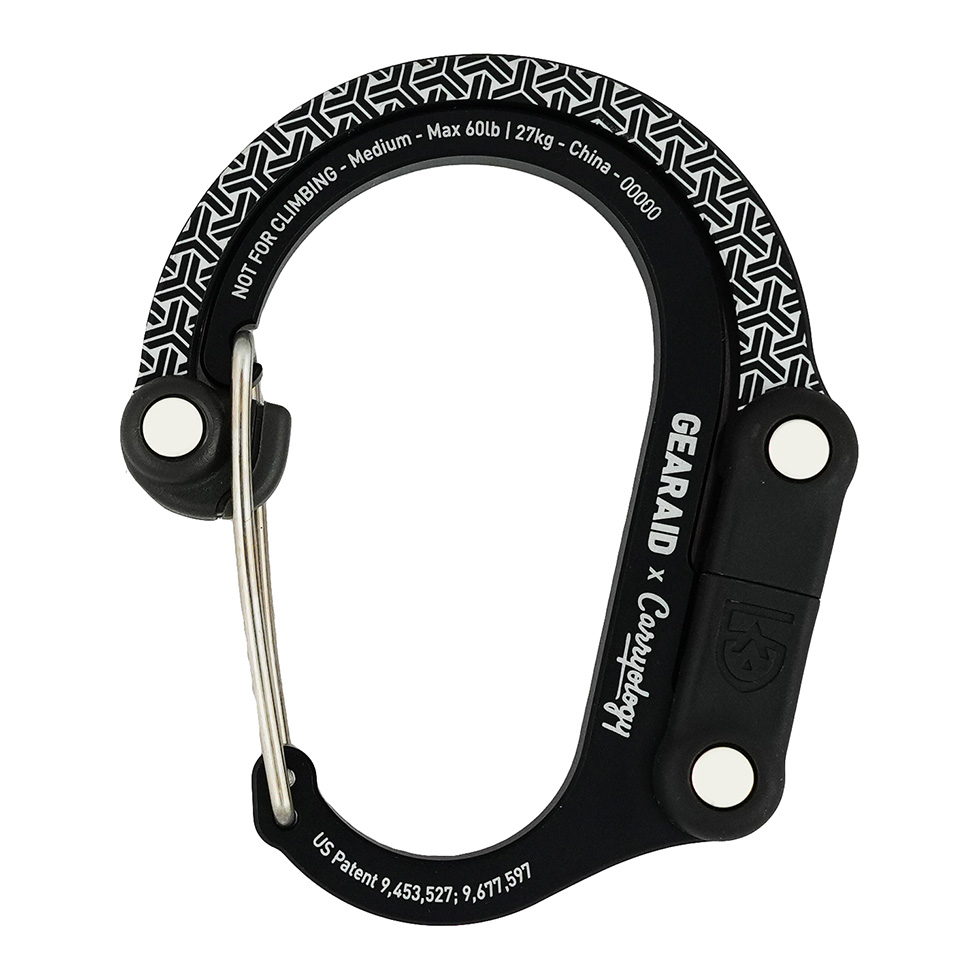
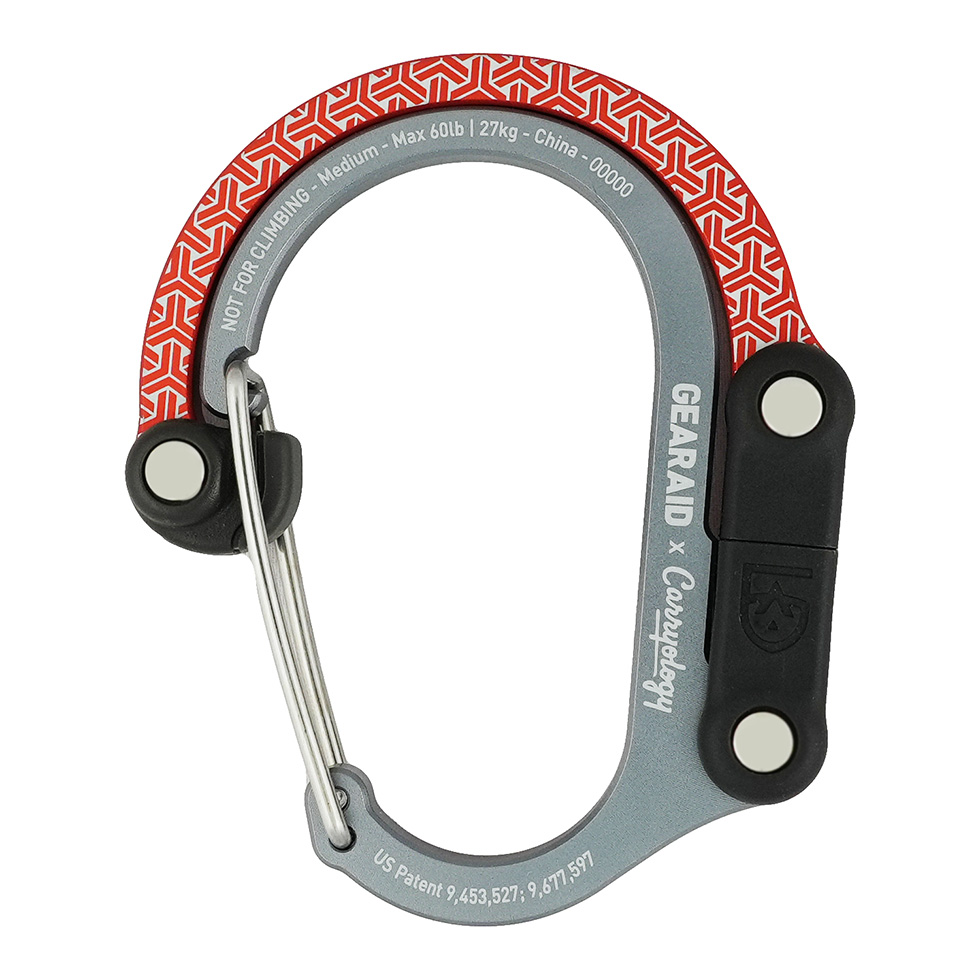
MEDIUM - $34.95
SPECS
Dimensions: 3” wide, 3.75” tall (closed), 7.25” tall (open)
Weight: 2oz
Body material: Solid machine-cut aluminum with anodized finish, composite steel
FEATURES
Supports loads up to 60 lbs / 27 kg
Hook rotates 360° to keep gear accessible
Rubber tip on hook for secure grip on flat surfaces
Carryology Auxikko pattern
Orange and Black anodized finish
Pivoting joints allow hanging even in awkward spaces
Foldable hook nests compactly on gear clip until needed
Wide carabiner clip gate accommodates larger gear with ease
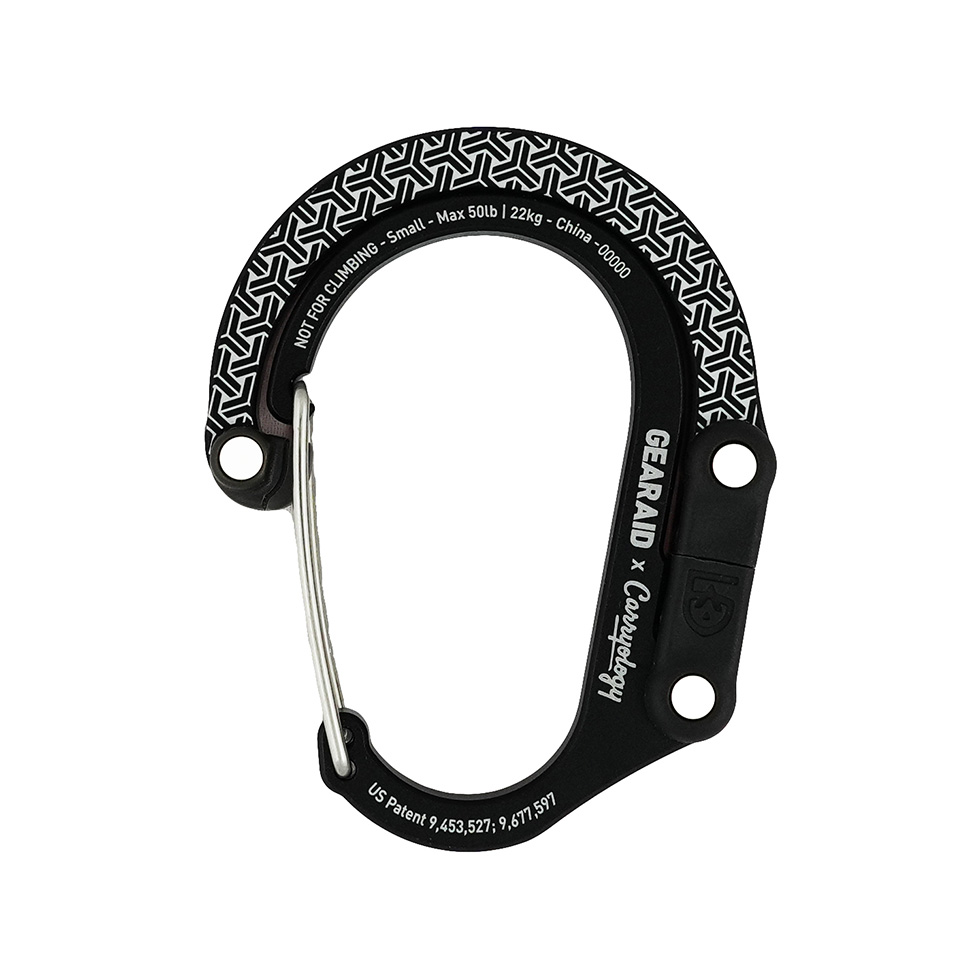
SMALL - $30.95
SPECS
Dimensions: 2.4″ wide, 3″ tall (closed), 5.6″ tall (open)
Weight: 1.1 oz
Material: Solid machine-cut aluminum with anodized finish, composite steel
FEATURES
Supports loads up to 50 lbs / 22.6 kg
Hook rotates 360° to keep gear accessible
Rubber tip on hook for secure grip on flat surfaces
Carryology Auxikko pattern
Orange and Black anodized finish
Pivoting joints allow hanging even in awkward spaces
Foldable hook nests compactly on gear clip until needed
Wide carabiner clip gate accommodates larger gear with ease


Laurence Fry
SENIOR EDITOR | PHOTOGRAPHER
Laurence is a Brit abroad, living in the North Eastern US. A creative at heart specialising in photography, videography, writing, and design. He loves the outdoors, and can often be found reading in a hammock (with a gin or IPA in hand).